|
<< Click to Display Table of Contents >> Editing a Rectangle |
  
|
|
<< Click to Display Table of Contents >> Editing a Rectangle |
  
|
Existing rectangles on a template can be editing by:
•selecting Edit > Rectangles
•double-clicking on the rectangle object on the sidebar
•clicking on the rectangle on the template
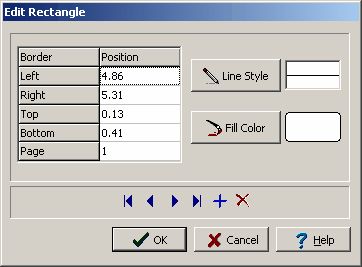
After performing one of the above tasks, the Edit Rectangles form will be displayed. If the template has two pages the form will have two tabs, the first tab is for first page and the second tab is for the second page. At the bottom of this form there are buttons to move to the first, previous, next, and last rectangle or to add and delete rectangles.

(The appearance of the form will differ slightly depending on if it is WinLoG or WinLoG RT)
The following information can be edited on this form:
Left: This is the position of the left border of the rectangle in inches or millimeters from the left side of the page. If the Rectangle button on the toolbar is used to create the rectangle, this position will be filled in by the program.
Right: This is the position of the right border of the rectangle in inches or millimeters from the left side of the page. If the Rectangle button on the toolbar is used to create the rectangle, this position will be filled in by the program.
Top: This is the position of the top border of the rectangle in inches or millimeters from the top of the page. If the Rectangle button on the toolbar is used to create the rectangle, this position will be filled in by the program.
Bottom: This is the position of the bottom border of the rectangle in inches or millimeters from the top of the page. If the Rectangle button on the toolbar is used to create the rectangle, this position will be filled in by the program.
Page: This is the page to display the rectangle. If the Rectangle button on the toolbar is used to create the rectangle, this position will be filled in by the program.
Line Style: This is the style of the rectangle border. The line style can be changed by pressing the Line Style button. The Line Properties form will then be displayed. Using this form the style, color, and width of the rectangle can be set.
Fill Color: This is the color to use to fill the inside of the rectangle. When the Fill Color button is pressed, the Color form is displayed. Using this form, a basic color can be selected or a custom color can be specified.