|
<< Click to Display Table of Contents >> boring/wells |
  
|
|
<< Click to Display Table of Contents >> boring/wells |
  
|
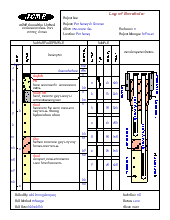
One of the primary data sources in the application comes from boring/wells. Logs can contain a very wide variety of data; such as, general boring/well data (ex. location, client, project number); lithologic descriptions and symbols; sample data; well completion details; water level measurements; geophysical logs; petrophysics data, and numerous graphs and text comments.
Below is a brief introduction on how to create and edit boring/wells, detailed information is provided in Chapter 4.
Using Templates
Templates are used to control the layout and formatting of boring/well logs. In general, all of the boring/wells in a project would use one or two templates to format the logs. In this way a consistent format can be established within a project and across projects. The default template used by the project when creating a boring/well is specified in the project information.
Template + Boring/Well Data = Boring/Well Log


The program comes with numerous easily customized templates, which can be edited and saved as new templates. Each template consists of a header, footer, and several columns. Templates can be customized to display different header and footer titles, number and type of columns, and fonts. A company logo or site map, stored as a bitmap can also be included in a template.
Creating a Boring/Well
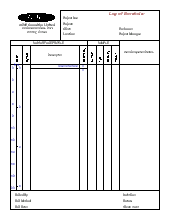
To create a new boring/well log either select File > New > Boring/Well or click on the New Boring/Well button on the Project toolbar.
Then click on the Project display at the location of the boring/well. The New Boring/Well form will be displayed where you can specify the name, symbol, depth, and coordinates of the boring/well.
Next select the template to use from the Select Template form. After the template has been selected, the new blank boring/well log will be displayed and can be edited.
Selecting a boring/well
An existing boring/well in the project can be opened by either selecting File > Open > Boring/Well or by selecting the boring/well on the sidebar and then selecting Popup > Open.
Editing a boring/well
After a boring/well has been opened or created it can be edited by:
•using the Edit menu,
•using the popup menu for the boring/well display,
•selecting the data object on the sidebar and then Popup > Edit,
•or by clicking on the data object on the boring/well display.
Data objects consist of header and footer data, column data, and draw objects. Draw objects can be placed anywhere on the log and consist of text, tables, rectangles, lines, and bitmaps. The column data contains all of the depth related data of the boring/well. The Edit menu contains menu items for all of the types of data that can be entered in the log; whereas, the popup menu for the boring/well display contains only the data that can be displayed by the template used for the log.
The types of data that can be entered for a log include:
•header and footer data
•depths and elevations
•lithology
•samples data
•well data
•graph data
•geophysical data
•petrophysical data
•calculated graph data
•tables
•water content data
•core data and photos
The entry and editing of the data in a boring/well log is described in detail in the Chapter 4.
The finished boring/well can be saved by clicking on the Save button on the toolbar or selecting the Save menu item from the File menu.
Printing a boring/well
The boring/well can be printed by pressing the Print button on the Log toolbar. Alternatively, boring/well logs can be included in a page layout for the project and printed. This is described in more detail in the Page Layouts section below.