

The Association of Geotechnical and Geoenvironmental Specialists (AGS) is a non-profit making trade association established to improve the profile and quality of geotechnical and geoenvironmental engineering. The AGS Format is for the electronic transfer of data in the geotechnical and geoenvironmental industries.
The newest version is known as “AGS4” which contains an updated Data Dictionary and revised rules for AGS Format and the previous version 3 format are supported for importing and exporting from GaeaSynergy.
Data Groups Supported
A wide variety of boring and well data can be imported and exported in AGS 4 format. The AGS format imports and exports data from ASCII text files in a specified format. This format is divided into a series of data groups that represent different types of geotechnical and environmental data. Some of these data groups must be present in all files and the rest are optional. For a complete description of the data dictionary click on the web site below or contact us at GAEA Technologies.
http://www.ags.org.uk/site/datatransfer/intro.cfm
Below is a list of the data groups currently supported. If there is data in a group not currently supported please contact us and we will do our best to add support for that group in the next update.
| Required | Group Name | Description |
| Yes | PROJ | Project Information |
| Yes | ABBR | Abbreviation Definitions |
| Yes | TRAN | Data Transmission Information |
| Yes | TYPE | Definition of Data Types |
| Yes | UNIT | Definition of Units |
| No | DICT | User Defined Groups and Headings |
| No | CORE | Coring Information |
| No | DCPG | Dynamic Cone Penetration – General |
| No | DCPT | Dynamic Cone Penetration – Data |
| No | DREM | Depth Related Remarks |
| No | ERES | Environmental Contaminant Testing |
| No | GEOL | Geological Descriptions |
| No | HORN | Hole Orientation and Inclination |
| No | IDEN | Density Tests |
| No | IFID | Volatile Headspace Testing (Flame Ionization) |
| No | IPID | Volatile Headspace Testing (Photo Ionization) |
| No | IPEN | Hand Penetrometer Tests |
| No | ISPT | Standard Penetration Tests |
| No | IVAN | Vane Tests |
| No | LOCA | Boring and Well Location Data |
| No | SAMP | Sample Information |
| No | SCPG | Static Cone Penetration – General |
| No | SCPT | Static Cone Penetration – Data |
| No | WSTD | Water Strike General |
| No | GRPH | Graph Data |
Importing AGS Data
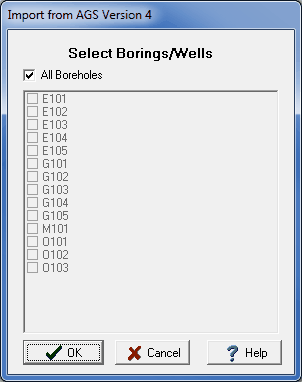
Before any data can be imported the project must first be opened. After a project has been opened, boring and well data can be imported from an AGS file by selecting File > Import > AGS. A file dialog will be displayed to specify the file to import. Next, the borings and wells to be imported must be selected on the Import form below. Either all of them can be imported or they can be imported individually using the checkboxes.
After the borings and wells have been selected, the display types must be selected for the AGS datasets and a template setup for the imported data.
On the form below the display type for each AGS dataset can be selected by clicking on it and selecting a new one from the combo box. The display types possible will change depending on the AGS group.
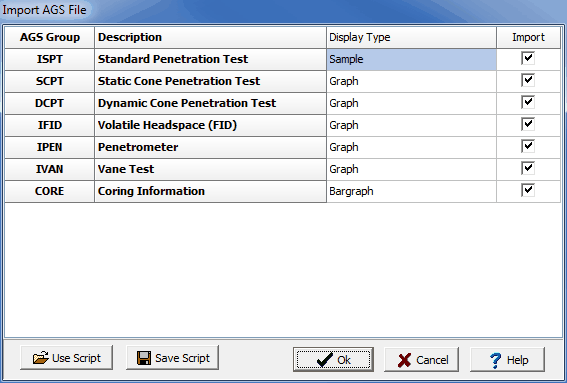
To make this process easier if you are importing AGS files a lot, you can create and use scripts to set the display types. To create a new script with the current display type settings click on the Save Script button and enter a name for the script. To open and use an existing script, click on the Use Script button and select the script.
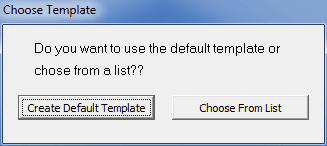
When the display types have been specified, click the Ok button to setup the template to use for the imported data. The template used to display the imported boring and well data can either be created automatically by the program or an existing template can be selected. These two options are discussed in the topics below.
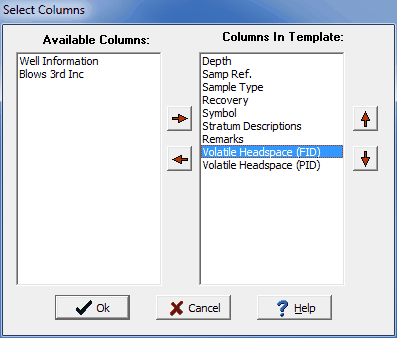
Creating a Default Template
If create a default template is selected the form below will be displayed. This form is used to select the columns to include in the template. The columns are determined by the data contained in the AGS file that is being imported. Columns can be moved between the available list to those to be included in the template using the left and right arrow buttons, The order of the columns to be shown in the template can be adjusted using the up and down arrow buttons. Columns at the top of the template list will be displayed on the left side of the template and the ones at the bottom on the right side of the template.
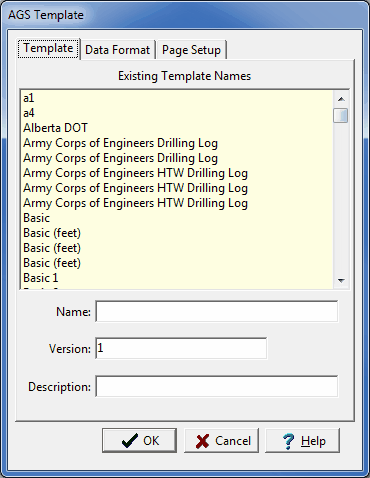
After the columns have been selected, press the Ok button to display the form below. This form is used to specify the template name, data format, and page setup. When his information has been specified click the Ok button to finish importing the data.
Selecting an Existing Template
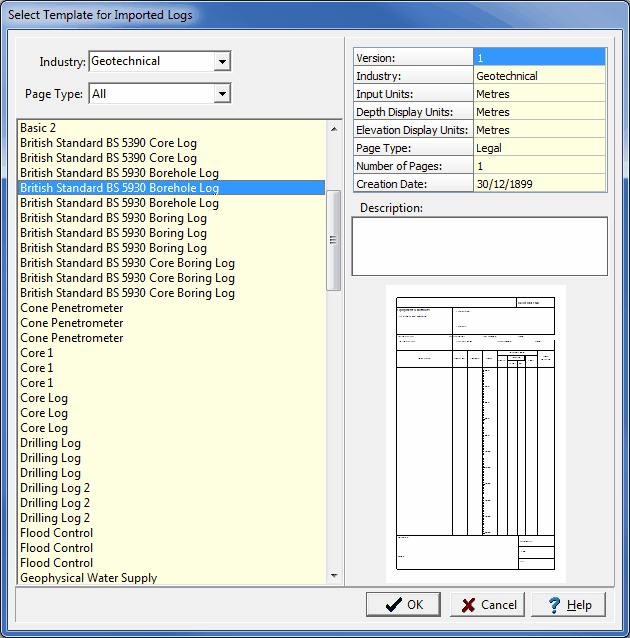
If select an existing template is chosen the form below will be displayed. This form displays the templates that can be selected for use with the imported data. Select the template and then click the Ok button to finish importing the data.
Exporting AGS Data
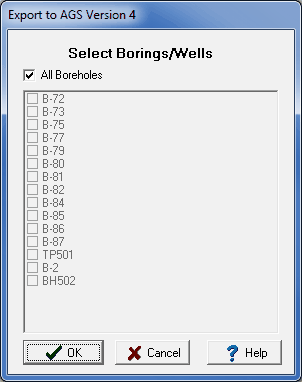
Before any data can be exported the project must first be opened. After a project has been opened boring and well data can be exported to an AGS file by selecting File > Export > AGS. A file dialog will be displayed to specify the file to save the exported data. Next, the borings and wells to be exported must be selected on the Export form below. Either all of them can be exported or they can be exported individually using the checkboxes.
The next step is to specify the data to be exported and add any additional information for the data. A wizard form is used to guide you through this process. This wizard guides you through the six steps required to export the data.
Exporting AGS Project Information
The first step is to specify any additional project information to be exported. After the information has been entered, the Next button can be used to go to the next step.
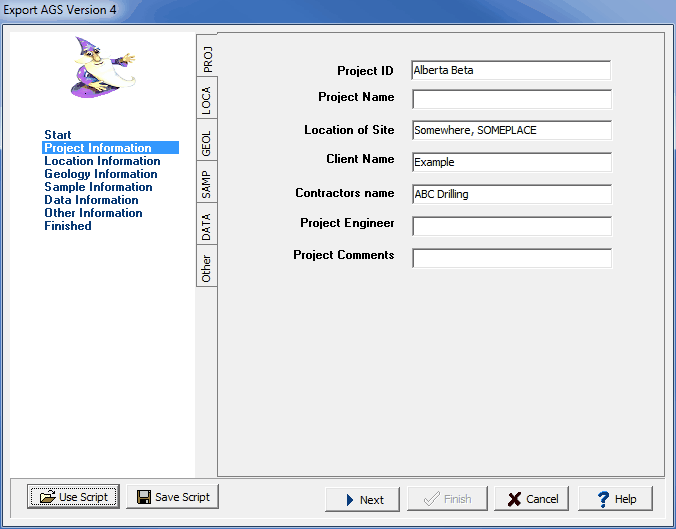
To make this process easier if you are exporting to AGS files a lot, you can create and use script files to for the export settings. To create a new script file with the export settings click on the Save Script button and enter a file name for the script. The script file should only be saved after all of the export settings have been entered. To open and use an existing script file, click on the Use Script button and select the file. An existing script file should be opened prior to entering any export settings. Script files should have the extension “.scp”.
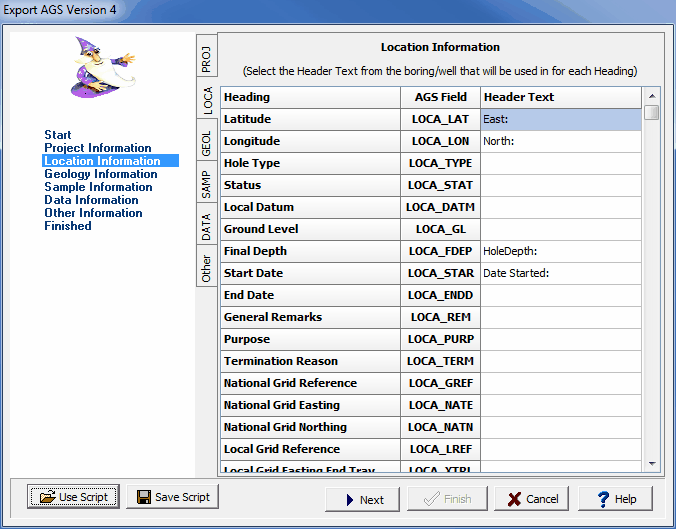
Exporting AGS Location Information
This step is used to specify the location (borehole/well) information to export. The table shown below can be used to specify what header text from the boring/well log is used for each heading to be exported. To change the header text to be used click on it and select it from the combobox. For AGS version 4 data the dataset group is called “LOCA” and for version 3 it is called “HOLE”.
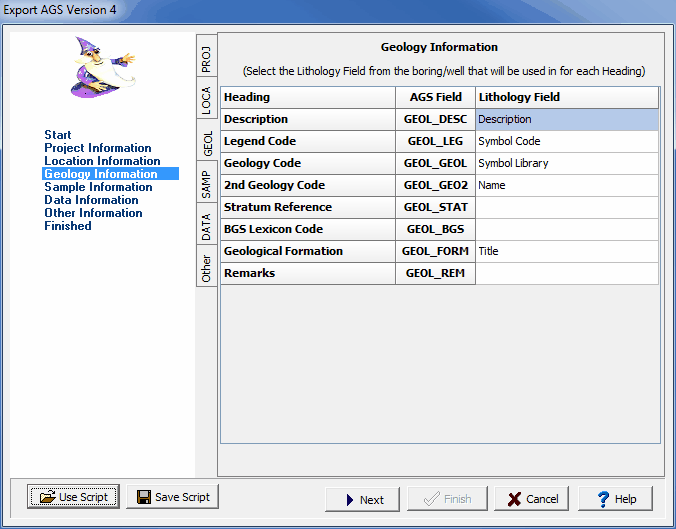
Exporting AGS Geological Information
This step is used to specify the lithology information to be exported. The lithology field to be exported for each heading can be specified by clicking on it and selecting the field from the combo box. After the information has been entered, the Next button can be used to go to the next step.
Exporting AGS Sample Information
This step is used to select sample other data from the borings/wells to be exported and what AGS group and type to use for the export.
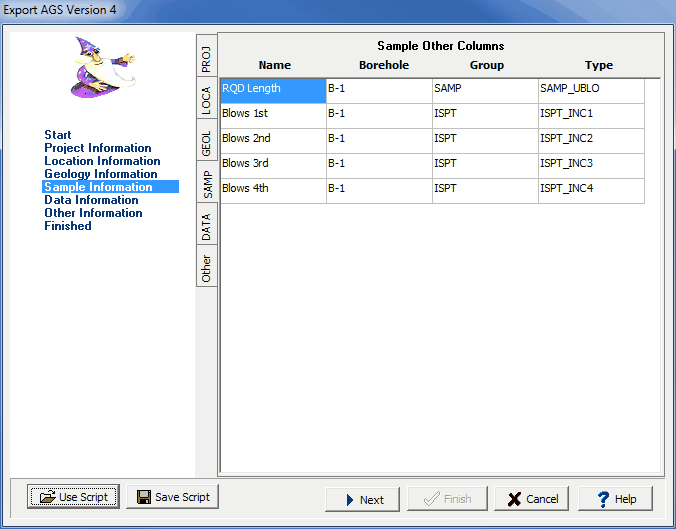
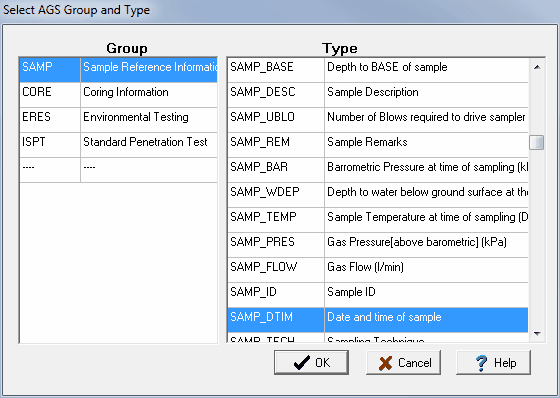
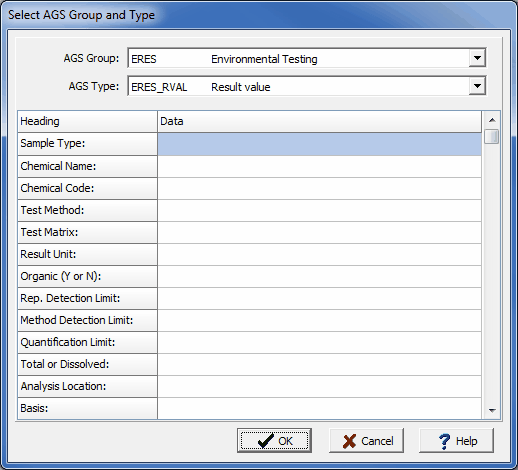
To specify the AGS group and type for each other data field, double click on the Type column and the form below will be shown. This form can then be used to select the AGS group and type. The AGS groups that can be selected will depend on whether exporting to AGS version 3 or 4 format.
Exporting AGS Data Information
This step is used to specify what datasets from the borings/wells are to be exported. The datasets present in the borings/wells are displayed in the table along with the AGS group to use for the dataset. The checkbox on the right is used to determine if the dataset is to be included in the export.
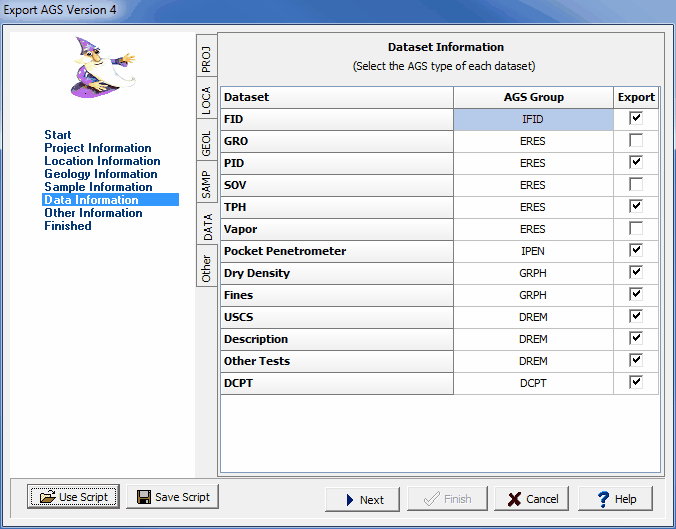
To specify the AGS group and type to use for the dataset, double click on it and the form below will be displayed. This form is used to select the AGS group, AGS type, and specify any additional information for the AGS group. The AGS groups that can be selected will depend on whether exporting version 3 or 4.
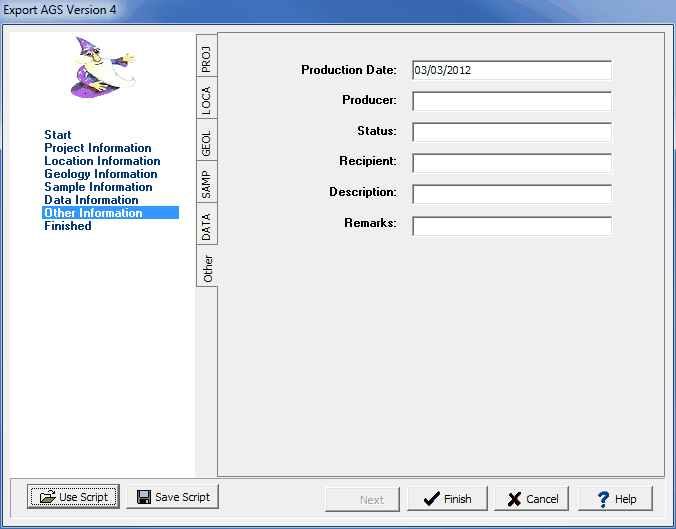
Exporting AGS Other Information
The last step is to specify any other information for the export. This information to be exported will depend on the version of AGS to be exported. After the information has been entered, press the Finish button to complete the export.
Transform your geoscientific analysis with GaeaSynergy software, designed for engineers and geoscientists frustrated by complicated tools.