
Did you know that accurate calibration of a photoionization detector (PID) can significantly enhance your environmental safety protocols? When it comes to detecting volatile organic compounds (VOCs), the precision of your equipment can mean the difference between identifying hazards early and facing dire consequences later. In this detailed guide, we will delve into everything you need to know about calibrating a PID, ensuring you use this critical tool effectively and safely.
Understanding Photoionization Detectors (PIDs)
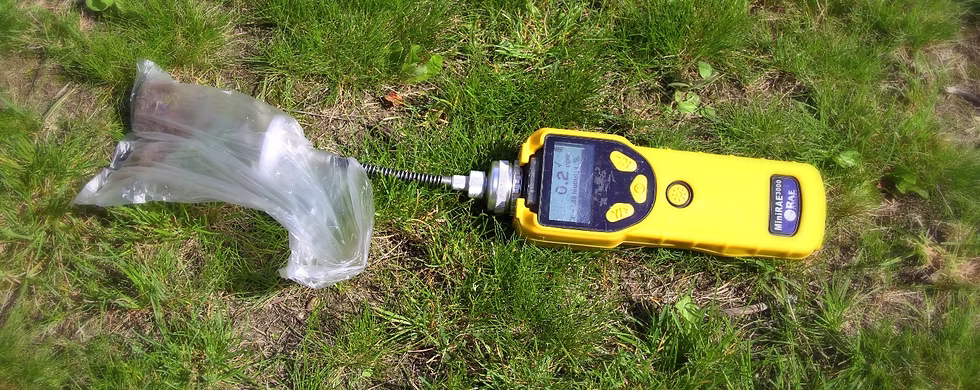
To begin our exploration of calibrating photoionization detectors (PIDs), it’s essential to understand their function and significance. PIDs are devices used to measure the concentration of volatile organic compounds (VOCs) in air or other gases. They are invaluable in various industries, including environmental monitoring, industrial hygiene, and safety management. Their effectiveness largely depends on regular calibration to ensure accurate readings.
What are Volatile Organic Compounds (VOCs)?
VOCs are organic chemicals with high vapor pressures at room temperature. These compounds can have adverse health effects on humans and the environment. Common examples include benzene, formaldehyde, and toluene. Understanding VOCs is essential for any professional involved in monitoring air quality.
Importance of Calibrating a PID
Calibrating a PID is a critical process that enhances the reliability of the readings. Regular calibration ensures that the detector provides accurate measurements, which is crucial for safety assessments, regulatory compliance, and effective decision-making in environmental practices. Uncalibrated PIDs can lead to misleading data, potentially resulting in health risks or environmental contamination.
When to Calibrate Your PID
When working with PIDs, there are essential moments to consider calibration:
- Before Initial Use: Always calibrate your PID before using it for the first time to establish a baseline.
- Regular Interval Checks: It’s generally recommended to calibrate every 30 days or after about 100 hours of use, depending on manufacturer recommendations.
- After a Significant Event: If the PID has been subjected to severe conditions, such as extreme temperatures or humidity, recalibration is necessary.
Equipment Needed for Calibration
Calibration of a PID requires specific tools and setups:
- Calibration Gas: The most critical item is the calibration gas. Ensure it is a certified standard and is appropriate for the VOCs you are testing.
- Pressure Regulator: You’ll need a pressure regulator to ensure the calibration gas flows at the correct pressure.
- Calibration Adapter: This essential piece of equipment connects the PID and calibration gas line.
- Tools for Maintenance: Regular cleaning and maintenance tools to keep the PID in working condition.
Step-by-Step Calibration Process
Calibrating a PID involves several steps. Here’s a structured approach:
Step 1: Prepare the Equipment
Before starting, make sure all equipment is clean and in good working order. Check the PID for any signs of wear or damage.
Step 2: Select the Calibration Gas
Choose a calibration gas appropriate for the compounds you will measure. Ensure its concentration is within the detectable range of your PID.
Step 3: Set Up the Calibration Station
Connect the calibration gas to the PID using the calibration adapter. Attach the pressure regulator to ensure a smooth gas flow.
Step 4: Power On the PID
Turn on your PID and allow it to warm up per the manufacturer’s guidelines. This period may vary but generally lasts around 5 to 10 minutes.
Step 5: Zero the PID
Before introducing the calibration gas, zero the PID sensor according to the manufacturer’s instructions. This step ensures that any background noise or interference is minimized.
Step 6: Introduce Calibration Gas
Slowly introduce the calibration gas to the PID. Observe the readings and allow the detector to adjust.
Step 7: Adjust the Calibration
Based on the manufacturer’s guidelines, adjust the PID output to match the known concentration of the calibration gas. Ensure this is done carefully, as the precise adjustment will impact the accuracy of future readings.
Step 8: Document the Calibration Process
Document the calibration date, calibration gas type, and any adjustments made to the PID. This documentation is crucial for maintaining a calibration history and ensuring compliance with regulations.
Step 9: Verifying the Calibration
After adjustment, it’s essential to verify the calibration by testing the PID against another known standard. Ensure it provides consistent readings in various environments to validate the calibration.
Common Challenges in Calibration
While calibration is crucial, it can present several challenges:
- Environmental Factors: Temperature variations and humidity levels can affect calibration gas performance, leading to inaccurate readings.
- Contamination: PIDs can be sensitive to contaminants, affecting the calibration accuracy. Regular maintenance is necessary to mitigate this issue.
- Calibration Drift: Over time, PIDs may drift from their calibrated settings, requiring more frequent checks than anticipated.
Best Practices for Maintaining PID Calibration
- Regular Training: Ensure all users are adequately trained in both operating and maintaining PIDs, including calibration processes.
- Consistent Documentation: Keep detailed records of calibration and maintenance, including dates, gas concentrations, and any anomalies.
- Use Certified Gases: Always use certified calibration gases to ensure accuracy and reliability in your readings.
- Conduct Routine Checks: Regularly inspect your PID’s performance to catch any issues early and ensure time-sensitive recalibrations.
Summary: Where Do We Go from Here?
Calibrating a photoionization detector (PID) is a process that cannot be overlooked. With the potential risks associated with VOC exposure, implementing a comprehensive calibration routine can lead to better safety practices and compliance. By understanding the calibration procedure and best practices, professionals can enhance their outcomes and ensure a safer work environment.
If you want to dive deeper into effective field management and data collection using innovative tools,
Related Articles
- The Complete Guide to Drilling and Sampling for Environmental and Geotechnical Investigations
- Crafting an Effective Health & Safety Plan (HASP)
- Crafting an Effective Emergency Response Plan for Environmental and Geotechnical Drilling
- Essential Job-Site Safety Checklist for Geotechnical and Environmental Drilling
- Essential Steps to Ensure Safe Drilling: Utility Clearances Before Boring Operations
- Hazards to Consider Before Drilling Boreholes in Urban Areas
- Creating A Comprehensive Environmental Sampling And Analysis Plan: Your Guide To Success
- Mastering Conceptual Site Models: A Step-by-Step Guide to Understanding Contaminants
- Mastering Contaminants of Concern: Identification and Delineation
- Sampling Frequency: The Key to Effective Environmental Investigations
- The Critical Role of QA and QC Plans in Environmental Investigations
- Strategic Considerations for Determining Drilling Locations in Environmental Investigations
- The Essential Guide to Selecting Containers and Preservatives for Environmental Soil and Groundwater Samples
- Guide to Collecting and Storing Soil and Groundwater Samples for Environmental Investigations
- Mastering Sample Planning in Geotechnical Investigations: A Comprehensive Guide
- Strategic Insights: Determining Ideal Locations for Geotechnical Investigation Drilling
- The Essential Guide to Selecting and Managing Drilling Contracts for Successful Geotechnical and Environmental Investigations
- Mastering Field Procedures For Accurate Subsurface Investigations
- Mastering the Art of Calibrating a Torvane for Accurate Measurements
- Mastering Soil Testing: How to Calibrate a Pocket Penetrometer for Accurate Readings
- Standard Penetration Testing: A Comprehensive Guide
- Classifying Soils During Drilling: Your Comprehensive Guide
- Designing a Monitoring Well for Environmental and Geotechnical Investigations
- Types of Protective Casings used for Monitoring Wells
- Choosing the Best Filter and Grout Materials for a Monitoring Well
- Choosing the Best Screen and Riser Pipe Materials for Monitoring Wells
- Standard Operating Procedures for Purging and Sampling Groundwater Monitoring Wells