
Lithology macros are used to insert previously defined text, titles and symbols into lithologic layers on logs. By using lithology macros, logs can be created faster and more consistently.
The lithology macros can adhere to standardized soil classifications; such as USCS. In addition, the use of a unified naming system of layers makes the automatic generation of cross-sections more accurate.
Creating and Editing Lithology Macros
To create or edit lithology macros select Tools then Boreholes then Lithology Macros. The Lithology Macros form will be displayed.

On this form, lithology macros can be edited, created, and deleted. Each lithology macro consists of a Name, Title, Text, and Symbol.
- The Name should be unique and is used for the selection in logs as well as for cross-section generation.
- The Title is optional and will be inserted for the title of the lithologic layer in the log.
- The Text will be inserted for the description of the lithologic layer in the log.
- The Symbol is the symbol of the lithology that will be used for the lithologic layer. When it is selected, a button will appear for the symbol. To change the symbol, click on the button and the Select Lithologic Symbol form will be displayed. This form can be used to select the colors, lithologic library and symbol.
Using Lithology Macros in Logs
When creating a log, lithologic macros can be used to quickly enter the name, title, description and symbol for a layer.
If the template for the log specifies the Title Edit mode as “Text” for the lithology description column, the Name column will not appear on the Lithology List form and lithology macros can not be used.
If the “Use Strata Names List” option is selected in the template, the names will need to selected from the list of lithology macros. The names selected for each layer in this situation will have to be unique for each layer. By using this option and specifying unique names, the auto-generation of the strata in the cross-section will be greatly improved.
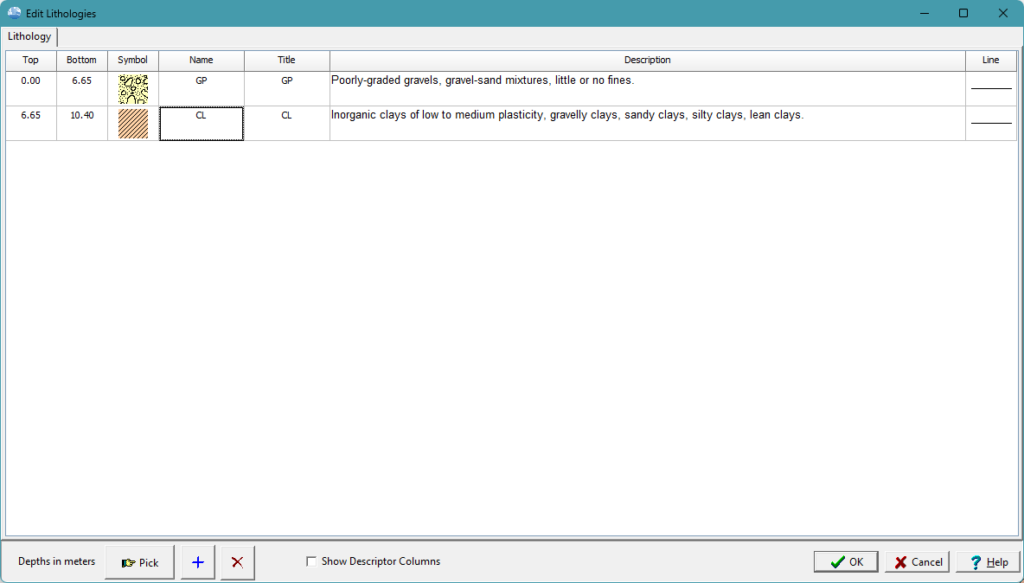
To select a lithology macro for a layer click on the Name column on the Edit Lithologies form, the Lithology Macros form will be displayed.
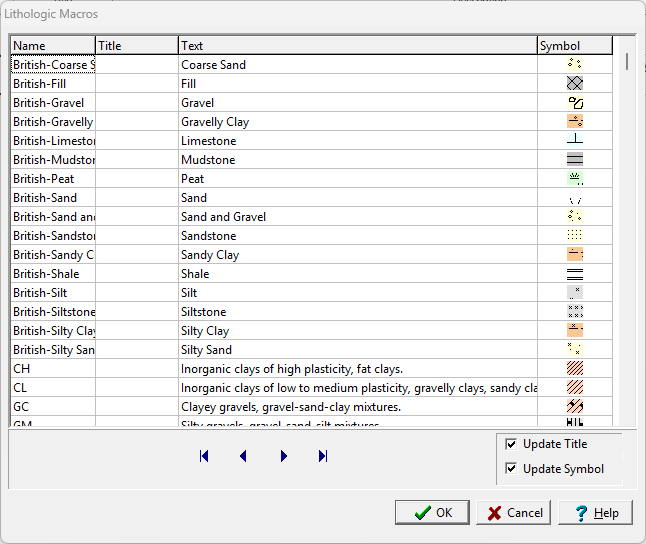
An existing lithology macro can be selected or a new one can be added using the Add button at the bottom of the form. The title and symbol can also be updated for the layer using the checkboxes at the bottom of the form.
In addition to the Add button, lithology macros can also be created from previously defined layers on the log by clicking on the layer on the Edit Lithologies form with the right mouse button and selecting “Add Current as Macro” from the popup menu.
Transform your logging experience with WinLoG. Say goodbye to complicated tools that overwhelm and frustrate. With WinLoG, create borehole and well logs effortlessly, enhance collaboration, and deliver seamless projects.
Related Articles
- Creating a Borehole Log from Field Data Using WinLoG and WinLoG Field Assistant
- Using Templates for Faster Borehole Logging: Standardizing Geotechnical Workflows in WinLoG
- Editing and Structuring Lithology Data: Best Practices for Accurate Borehole Logs and Geoscience Workflows
- WinLoG Advanced Features You’re Not Using (But Should)
- How Do I Create and Manage Lithologic Libraries in WinLoG?
- How Do I Create and Enter Tables in WinLoG Templates and Logs?
- How Do I Upgrade a Single User version to WinLoG Version 6?
- Moving to WinLoG v6: Seamless Data Migration for Your Borehole History
- How to use Lithology Descriptors to Standardize Logs
- How to use Sample Descriptors to Standardize Logs
- How to add Geophysical Data to a Well Log in WinLoG
- How to Create a Well Diagram in WinLoG
- How to Import Boring and Well Data from Excel in WinLoG
- How to Import Multiple Boring and Well Locations from Excel to WinLoG
- Why is my WinLoG header data not displaying on the log?
- Why do some of the WinLoG headers in my template not appear when entering boring data?