
Migrating your GaeaSynergy network license and data to a new server is a critical task that requires careful planning and execution. Whether you’re upgrading hardware, improving performance, or restructuring your IT environment, following a structured process ensures minimal downtime and prevents data or licensing issues.
This step-by-step guide walks you through the complete process of transferring your GaeaSynergy Network License, users, and data safely to a new server.
The data and network license service do not need to be on the same server. If you only need to transfer the license service you can skip step 4.
Why Proper Migration Matters
A GaeaSynergy network setup involves both licensing and data components that are tightly integrated. Improper migration can lead to:
- License validation failures
- Loss of user configurations
- Data access issues
- Workflow interruptions for your team
By following the steps below, you ensure a smooth transition with minimal disruption.
Pre-Migration Checklist
Before you begin, make sure you have:
- Administrative access to both old and new servers
- Backup of your GaeaSynergy data
- Access to your license credentials
- Network permissions configured on the new server
Step 1: Install GaeaSynergy Network License Monitor and Service on New Server
Start by preparing your new server environment.
Install the GaeaSynergy Network License Monitor and Service on the new server. This component manages license distribution across users and must be fully operational before transferring licenses.
👉Install file for GaeaSynergy Network License Monitor and Service
Best Practices:
- Install using the latest version of GaeaSynergy
- Ensure required port 3000 is open
- Confirm the service is running successfully
Step 2: Export Users from the Old Server
Next, export all user accounts from your existing server.
This step preserves:
- Usernames
- Permissions
- Access configurations
How to Proceed:
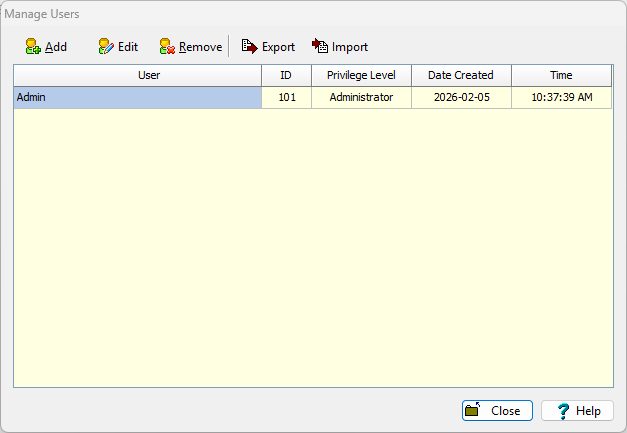
- Use the built-in export functionality in GaeaSynergy Network License Monitor
- Select Manager Users and then Export
- Save the export file in a secure location
Step 3: Relock the License on the Old Server
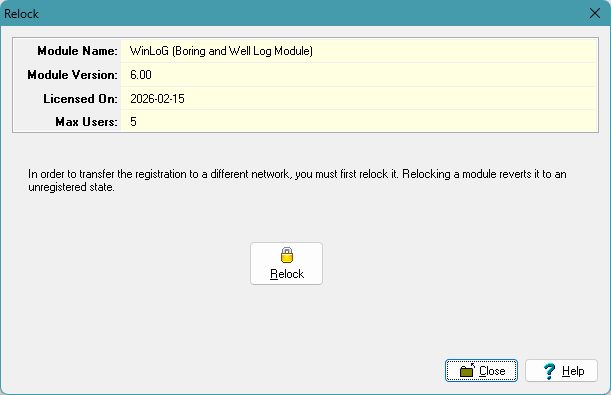
Before activating the license on the new server, you must relock it from the old server.
This step releases the license so it can be reassigned.
Important Notes:
- Ensure no users are actively using the system
- In Network Monitor go to Manage Licenses, highlight the module and click on Relock
- Confirm license release before moving forward
Step 4: Copy the Data to the New Server
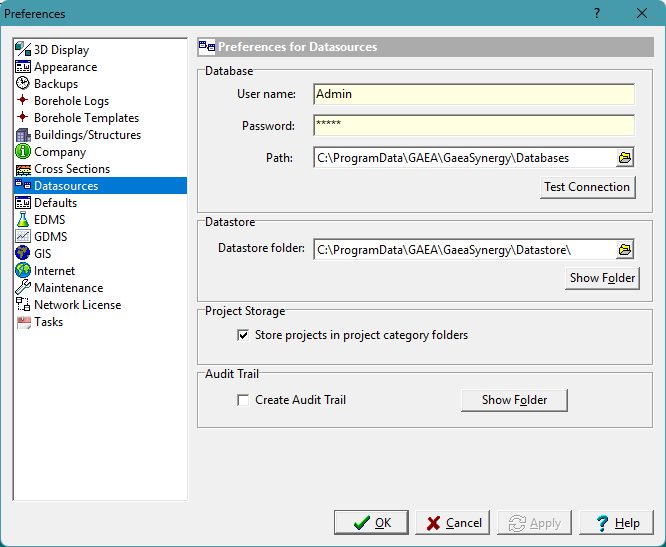
With licensing in place, transfer your GaeaSynergy data. Typically the data is contained in the folder “c:\ProgramData\GAEA\GaeaSynergy”. To confirm the location check the Datasources tab in Preferences in GaeaSynergy,
Recommended Approach:
- Perform a full data copy from the old server
- Maintain folder structure and permissions
- Use reliable transfer methods (e.g., secure copy or backup restore)
Key Considerations:
- Ensure no data is actively being modified during transfer
- Validate file completeness after copying
Step 5: License the Network on the New Server
Now that the license has been released, you can activate it on the new server.
Steps:
- Launch the License Monitor on the new server
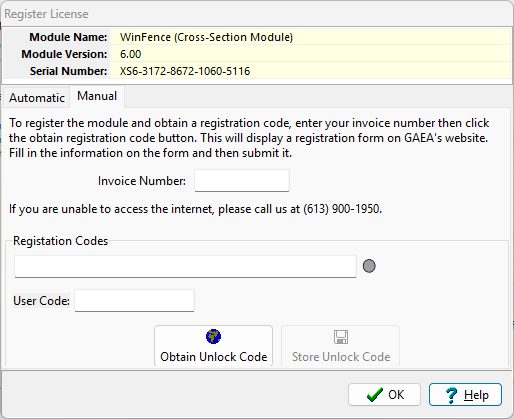
- Select Manage Licenses , highlight the module, and click on Register
- Enter your invoice number, registration code, and user code provided by GAEA
Verification:
- Confirm the license is recognized by restarting the GaeaSynergy Network License Service
- Ensure the correct number of seats/users is available in Network Monitor
Step 6: Import Users onto the New Server
Once data is in place, restore your user base.
Steps:
- Use the import function in Network Monitor by selecting Manage Users and then Import
- Select the previously exported user file
- Verify all users and permissions are correctly restored
Post-Import Check:
- Test user logins
- Confirm access to relevant projects and datasets
Step 7: Remove Network License Monitor and Service from the Old Server
After confirming everything is working on the new server, decommission the old setup.
Actions:
- Uninstall the License Monitor and Service
- Remove any remaining license files
- Disable related services
Why This Matters:
- Prevents licensing conflicts
- Ensures compliance with licensing terms
- Avoids accidental connections to the old server
Step 8: Update User Preferences in GaeaSynergy
After the service and data has been migrated, the preferences in GaeaSynergy need to be modified to reflect the new location of the server and data.
Actions:
- Select Preferences in the File menu of GaeaSynergy
- On the Datasources tab specify the new locations of the database and datastore
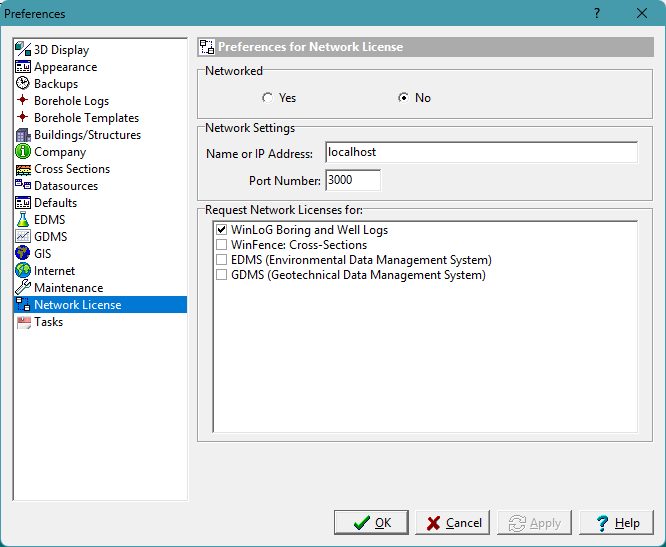
- On the Network License tab specify the name or IP address of the new server.
Post-Migration Validation
After completing all steps, perform a full system check:
- ✅ Users can log in successfully
- ✅ Data is accessible and intact
- ✅ License is functioning correctly
- ✅ No connections are being made to the old server
Common Pitfalls to Avoid
- Skipping the license relock step
- Forgetting to export users before migration
- Copying incomplete or live data
- Not verifying permissions on the new server
Final Thoughts
Transferring your GaeaSynergy Network License and data to a new server doesn’t have to be complicated—but it does require precision. By following this structured approach, you can ensure a smooth transition with minimal downtime and no loss of critical data.
If you’re planning a migration, consider scheduling it during off-hours and notifying users in advance to avoid interruptions.
Need Help?
If you encounter issues during migration or want assistance optimizing your GaeaSynergy setup, consider reaching out to your system administrator or GaeaSynergy support team.