
Lithology libraries are the foundation of your borehole logs, containing the geological symbols used to visually represent soil and rock layers. Properly configuring these libraries ensures consistency across all projects and allows for seamless data sharing between field and office teams.
Define the New Library
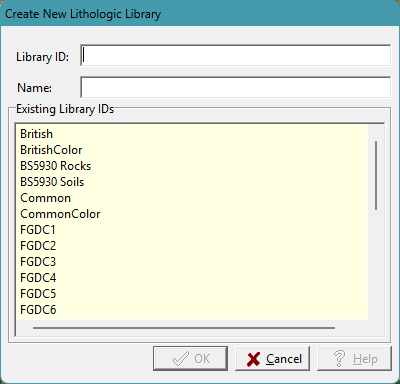
To start building your own custom library of geological symbols, create a new library by going to New then Lithology Library. Specify a unique Library ID and a name for the new library on the New Library form.
Specify the Symbols in the Library

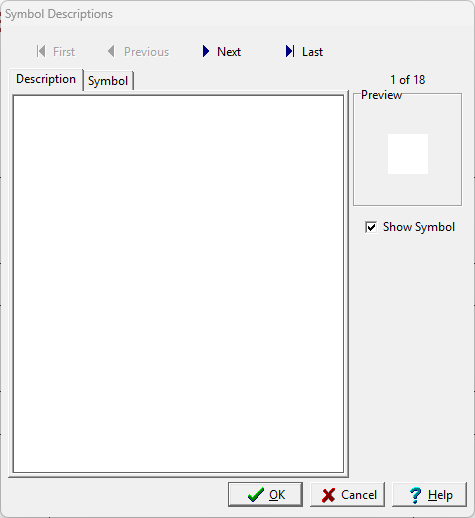
After the library has been created, it will be displayed showing the symbols and descriptions. Initially, these symbols and descriptions will be blank. Each lithologic library can typically store up to 18 symbols.
To specify a symbol and description, click on the blank square. The following can be specified on the Symbol Descriptions form:
- Description: Assign a default description to each symbol. These descriptions will automatically populate your log legends but can be edited for specific projects if needed.
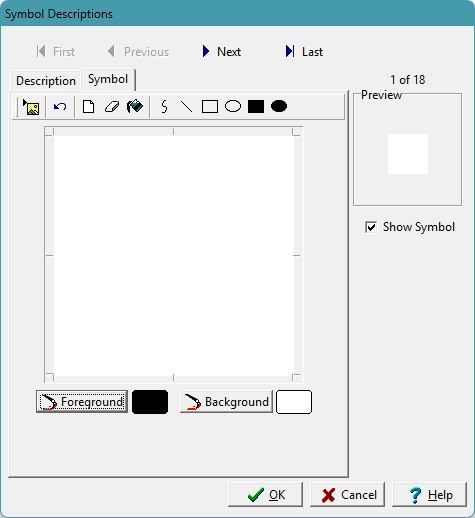
- Symbol: The symbol can either be drawn using the toolbar at the top or a bitmap symbol can be imported using the Import button on the toolbar.
- Importing a Symbol: When importing a symbol it must be 40 x 40 pixels and have a 1 bit depth (monochromatic).
- Importing from Predefined Symbols: WinLoG comes with 100s of predefined symbols that can be recombined to create your own unique libraries. Typically, these symbols are stored in the folder “c:\Program Data\GAEA\GaeaSynergy\Datastore\Libraries”.
Managing and Sharing Libraries
Once your libraries are created, WinLoG offers several tools to maintain and distribute them:
- Import and Export: You can easily move libraries between different installations of WinLoG or share them with colleagues using the Import/Export lithology libraries feature.
- Cloud Syncing: For organizations using the network version, libraries can be uploaded to an FTP site using the GaeaSynergy Network Data Monitor. This makes them immediately available to field crews using WinLoG Field Assistant on tablets.
- Lithology Macros: To speed up data entry, you can create lithology macros that combine symbols with predefined text and titles, allowing you to insert common layers with a single click.
Summary
To manage lithology in WinLoG, use the Symbol Libraries menu to create custom collections of up to 18 symbols each, complete with default descriptions. For maximum efficiency, utilize lithology macros for rapid data entry and sync your libraries to a central FTP site to ensure all team members are using standardized geological patterns.
Related Articles
- Creating a Borehole Log from Field Data Using WinLoG and WinLoG Field Assistant
- Using Templates for Faster Borehole Logging: Standardizing Geotechnical Workflows in WinLoG
- Editing and Structuring Lithology Data: Best Practices for Accurate Borehole Logs and Geoscience Workflows
- WinLoG Advanced Features You’re Not Using (But Should)
- How Do I Create and Enter Tables in WinLoG Templates and Logs?
- How Do I Upgrade a Single User version to WinLoG Version 6?
- Moving to WinLoG v6: Seamless Data Migration for Your Borehole History
- How to use Lithology Descriptors to Standardize Logs
- How to use Sample Descriptors to Standardize Logs
- How to add Geophysical Data to a Well Log in WinLoG
- How to Quickly Enter Standardized Lithologic Layers in WinLoG
- How to Create a Well Diagram in WinLoG
- How to Import Boring and Well Data from Excel in WinLoG
- How to Import Multiple Boring and Well Locations from Excel to WinLoG
- Why is my WinLoG header data not displaying on the log?
- Why do some of the WinLoG headers in my template not appear when entering boring data?