

Migrating from StrataExplorer 3 to GaeaSynergy 6 is an important upgrade that brings improved performance, enhanced data handling, and modern workflows. However, because GaeaSynergy uses a different database structure, the migration process must be done carefully to avoid errors or data issues.
This guide walks you through the correct process for both single user and network license environments.
🚨 Important Before You Begin
Before starting the migration, keep these critical points in mind:
- ✅ Back up all data before making any changes
- ❌ Do NOT point GaeaSynergy to the StrataExplorer 3 database folder
- ❌ Do NOT run StrataExplorer and GaeaSynergy at the same time
GaeaSynergy uses a newer database structure, and attempting to directly connect to the old database will cause the software to stop working.
Understanding the Migration Process
Unlike a simple upgrade, this process involves importing data into a new database structure rather than reusing the existing one.
The steps differ depending on whether you are using:
- A Single User License
- A Network License
Single User License Migration
If you are running StrataExplorer on a standalone machine, follow these steps:
Step 1: Install GaeaSynergy 6
Download and install the latest version of GaeaSynergy on your computer.
👉 Install it on the same machine if possible to simplify migration.
Step 2: Register Your License
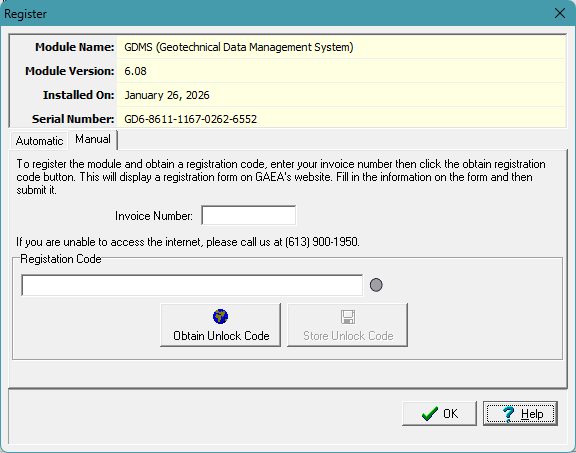
Launch GaeaSynergy and register your license by going to Tools → Manage Licenses. Select the module and click on Register. Enter the invoice number and registration code provided by GAEA.
👉 Ensure the license is active before proceeding.
Step 3: Upgrade Data (Same Computer)
If GaeaSynergy is installed on the same computer as StrataExplorer:
- Open GaeaSynergy
- Go to Tools → Upgrade → StrataExplorer Version 3
- Follow the prompts to convert your existing data
This is the fastest and most direct migration method.
Step 4: Import Data (Different Computer)
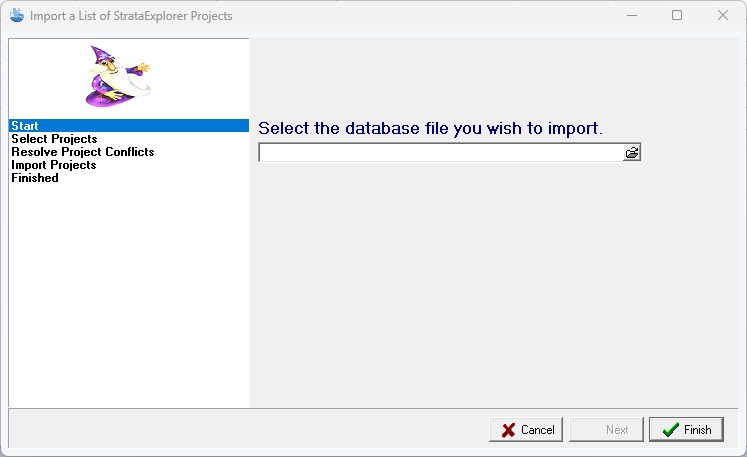
If installing on a different computer, you must import your data:
- Go to File → Import → StrataExplorer 3 Data and follow the instructions provided by the import wizards.
- Import:
- Individual projects, or
- A list of projects
- Import templates using a list as well
👉 This ensures all project data and templates are properly converted.
Step 5: Uninstall StrataExplorer
Once you confirm everything is working in GaeaSynergy:
- Uninstall StrataExplorer 3
- Remove any leftover files if necessary
Network License Migration
For multi-user environments, follow this process:
Step 1: Install License Monitor and Service on Server
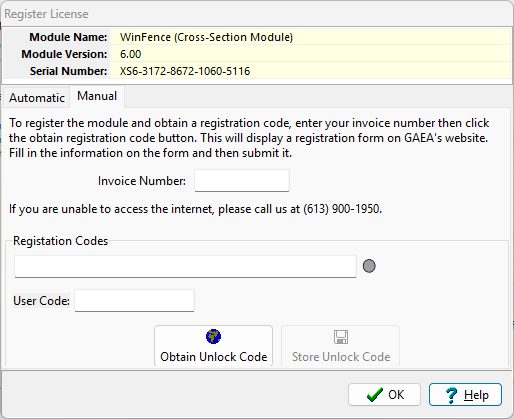
Install and license the GaeaSynergy License Monitor and Service on your server. To license the module, run Network Monitor and select Manage Licenses. Select the module and click on Register. Enter the invoice number, registration code, and user code provided by GAEA.
👉 This manages all client connections and licensing.
Step 2: Install and Update User Preferences in GaeaSynergy
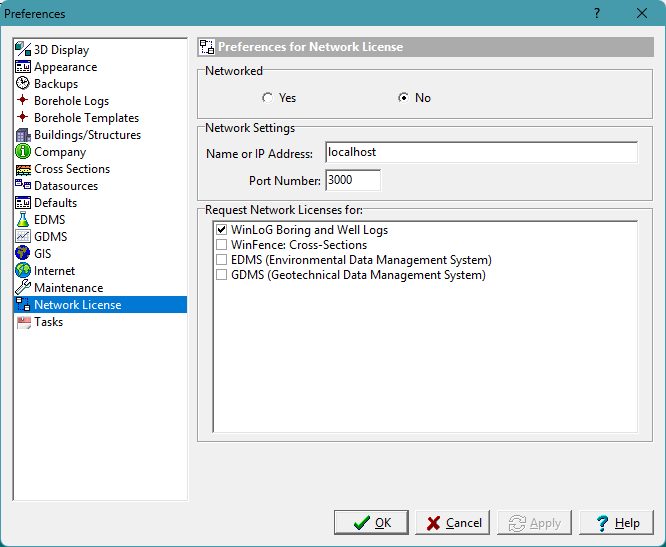
Install GaeaSynergy on all user machines. After this, the preferences in GaeaSynergy need to be modified to reflect the new location of the server and data.
- Select Preferences in the File menu of GaeaSynergy
- On the Datasources tab specify the new locations of the database and datastore
- On the Network License tab specify the name or IP address of the new server.
Step 3: Import StrataExplorer Data
On a client computer:
- Open GaeaSynergy
- Go to File → Import → StrataExplorer 3 Data
- Import:
- Projects individually or via list
- Templates via list
👉 Do not attempt to reuse the old database directly.
Step 4: Remove StrataExplorer License Server
After confirming everything works:
- Remove the StrataExplorer License Monitor and Service
- Decommission the old system
Post-Migration Checklist
After completing the migration, verify:
- ✅ All projects are accessible
- ✅ Templates are available
- ✅ Users can connect (network setup)
- ✅ No errors occur when opening data
Common Mistakes to Avoid
- ❌ Pointing GaeaSynergy to the old StrataExplorer database
- ❌ Skipping the import process
- ❌ Running both systems simultaneously
- ❌ Forgetting to back up data
Final Thoughts
Migrating from StrataExplorer 3 to GaeaSynergy 6 is straightforward when done correctly. The key is understanding that this is a data migration—not a direct upgrade.
By following the correct steps for your license type, you can ensure:
- A smooth transition
- No data loss
- Minimal downtime
Need Help?
If you need assistance with your migration or want to ensure everything is configured correctly, reach out to your system administrator or GAEA support team.