
Creating accurate geological profiles in WinFence is a structured process that combines automated data import with manual refinement. Whether you are defining standard horizontal layers or complex lenses, the software’s specialized toolset ensures your cross-sections are both visually professional and scientifically sound.
Follow this guide to master the addition and manipulation of strata.
Adding and Connecting Strata
WinFence works best when strata are added sequentially from the top of the cross-section to the bottom.
- Automatic Correlation: When creating a cross-section, the program automatically attempts to connect strata between boreholes by looking for similarities in lithology, thickness, and occurrence.
- Manual Drawing: For complex geologies, use the Boundary Tool (popup menu) to place vertices (nodes) that define the path of your strata.
Adding Strata
You can add additional strata using the steps below.
- You should add the strata starting at the top of the cross-section and proceeding to the bottom.
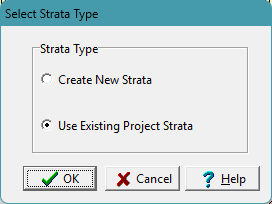
- You can add it by going to Edit > Strata > Add Strata. The Select Strata Type form will let you either create a new strata or use an existing project strata. If the strata already exists in the project you should select this option. If it doesn’t exist create a new strata. The strata are automatically added from boreholes and other cross-sections in the project. After you have added or selected the strata to edit, the Edit toolbar should be shown at the top of the cross-section.
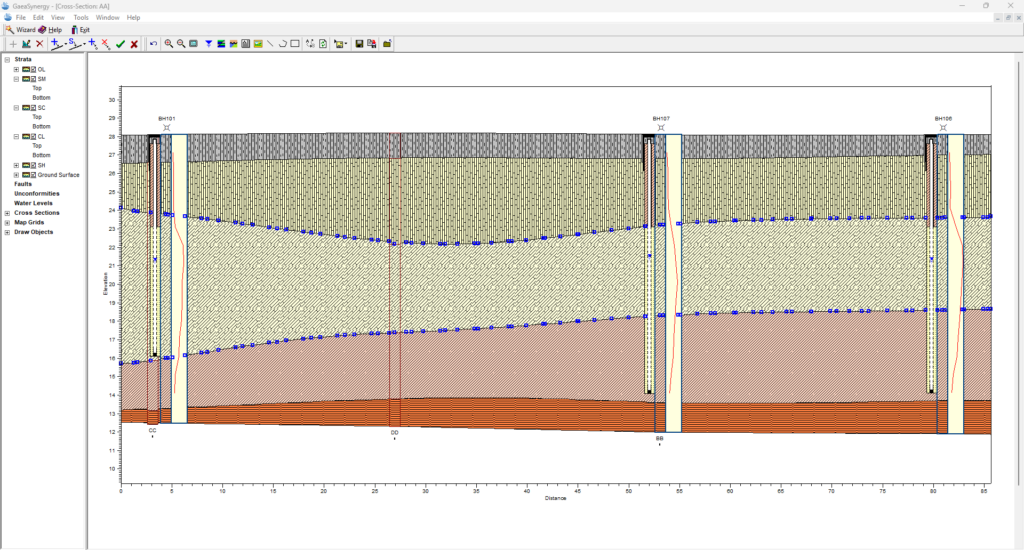
- Start by adding the top layer boundary of the strata by selecting Top from the Add button on the toolbar or popup menu. Then click on the left cross-section boundary where the strata will start. Next click on the top boundary points from left to right, placing at least one point at each borehole. Finish the boundary by double-clicking on the right cross-section boundary.
- Add the bottom layer boundary the same way as the top, by selecting Bottom from the Add button on the toolbar or popup menu.
- After the top and bottom boundaries have been entered, finish editing the strata by selecting Done from the toolbar or popup menu.
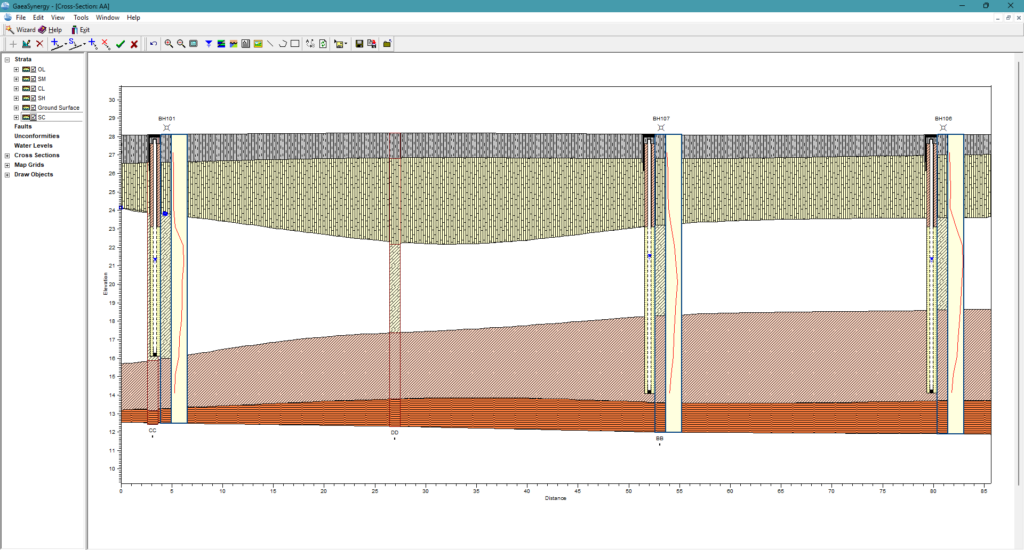
- Add the remaining strata the same way as the previous one, except for the top layer boundary you can use the bottom of the layer above by selecting Top from the Snap button on the toolbar or popup menu. This will let you click anywhere on the layer above to specify that the bottom of this layer forms the top boundary of your current strata.
Connecting Strata
There are three methods for drawing and connecting strata boundaries: fully drawn, snapped or assigned. Click here to see a detailed post on editing and snapping strata.
Deleting Strata
If the strata boundaries that were automatically added when the cross-section was created are incorrect, they can be deleted and then added manually as described above.
- Select the strata by clicking on it and then select Delete Strata from the Boundary Tool (popup menu).
Summary
Adding strata in WinFence is a workflow that starts with Edit > Strata > Add Strata and moves from the top down. By utilizing the Boundary Tool (popup menu) for manual placement and snapping for automated alignment with boreholes and adjacent layers, you can create precise, professional-grade geological models.
Related Articles
- Creating Fence Diagrams in WinFence: A Complete Guide to Subsurface Visualization
- Visualizing Stratigraphy Across Sites: A Complete Guide to Subsurface Correlation and Interpretation
- How Do I Use Project Views to Display Cross-Sections in GaeaSynergy?
- How Do I Create a Cross-Section in WinFence Using My WinLoG Data?
- How Do I Edit Strata Styles and Segments in WinFence?
- How do I Print or Export a Cross-section to a PDF in WinFence?
- How do I Edit and Snap Boundaries in WinFence?